

Setup Wizard (Recommended for New Users)
For first-time use, run the setup wizard to complete all configuration:Step 1: Select Model Provider
In the Model/auth provider list, scroll to the bottom and select:Step 2: Enter API Base URL
In the API Base URL field, enter the APIYI endpoint:Step 3: Choose API Key Input Method
When asked how to provide the API key, select:Step 4: Paste API Key
Paste your APIYI token (also called API key, starting withsk-) into the input field.
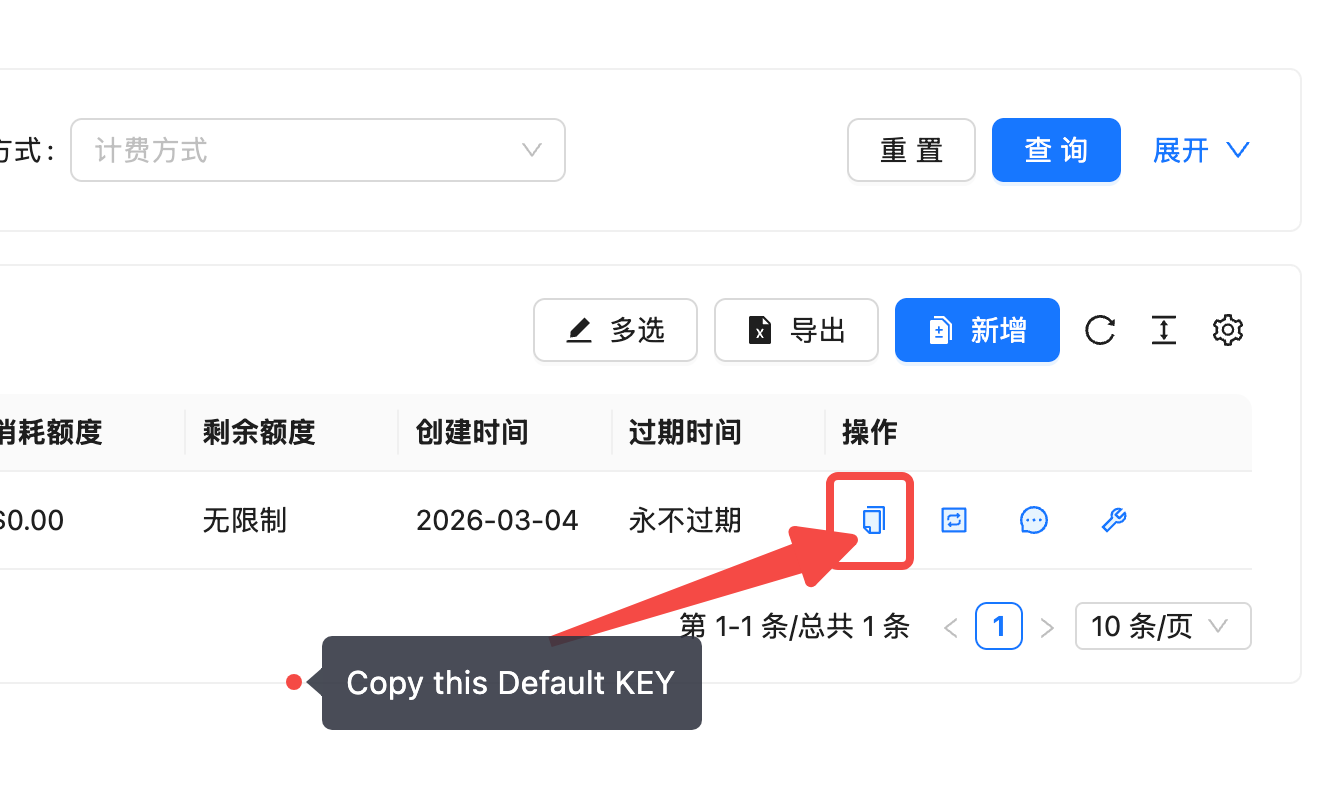
How to get your token:
- Open the APIYI Token Management page:
https://api.apiyi.com/token - Find the default token with type Pay-per-use Priority
- On the far right of that token’s row, under the “Actions” column, click the first copy button
- This copies the
sk-prefixed token (API key) — paste it here
Step 5: Select Endpoint Compatibility
In the Endpoint compatibility option, select:If you primarily use Claude models and need native features like Prompt Caching, you can select
Anthropic-compatible instead. See Anthropic Native Configuration for details.Step 6: Set Model ID
In the Model ID field, enter the model name you want to use, for example:claude-sonnet-4-6, deepseek-v3.2, gemini-3.1-pro-preview, etc.
Step 7: Verify and Complete
OpenClaw will automatically verify the configuration. Upon success, the system generates an Endpoint ID (e.g.,custom-api-apiyi-com), indicating the setup is complete.
Configuration Summary
Modify Configuration
After initial setup, use theconfigure command to re-enter interactive configuration:
- Model providers and default model
- Chat channel settings
- Skill enable/disable
- Gateway parameters
Single Config Commands
Quickly view or modify individual config items:Web UI Config Panel
After starting the Dashboard, you can also manage configuration in the browser:http://127.0.0.1:18789/ to access the settings page where you can:
- Visually edit model configuration
- Manage chat channel connections
- View and toggle configured skills
- Monitor logs and running status in real-time